Before my wife and I were married we were given an antique piano for the cost of the U-Haul to drag it home. Neither of us play (I took lessons for years but I still suck!) but it looked good and I figured I could fix it up "one of these days".
Fast-Forward 11 years and our kids are of piano-lesson age. I finally decided it was time to get off my duff and fix the thing. The cabinetry is not perfect but it is authentic and looks good enough so that gets left alone. That left several inoperative keys, a broken pedal mechanism, and some really dirty ivory.
 First
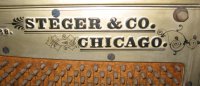
step: Research. My piano is a Steger & Co from Chicago.
Turns out to be a fairly well respected make. My serial number places the
year of manufacture in 1901 or 1902. Very Cool! Note the
hand-painted scrollwork on the harp around the logo! The action is
standard upright and I was able to quickly find several parts sources on the
web.
First
step: Research. My piano is a Steger & Co from Chicago.
Turns out to be a fairly well respected make. My serial number places the
year of manufacture in 1901 or 1902. Very Cool! Note the
hand-painted scrollwork on the harp around the logo! The action is
standard upright and I was able to quickly find several parts sources on the
web.
Next step: Triage. I knew several keys were dead and that the little "bridle straps" that tie the hammer mechanism together were brittle and in many cases broken. So I removed the action from the piano and put it on my kitchen island for examination.
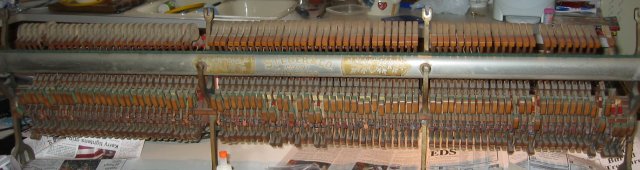
In the picture you can see some hammers are missing. I found all but one laying in the piano. I also found a missing hammer butt that was totally MIA (if you care what these parts are you can see a picture here). Everything was filthy. The bridle straps are the red tabs you can see along the lower third of the action. Broken bridle straps are the reason the bottoms of some of the hammer mechanisms seem to sag.
The good news is that the felt parts and hammers seem to be in excellent shape. There is no insect or rodent damage and the parts are firmly attached. I saw several tuner's signatures on the harp from around 1981 so I suspect many of these parts were replaced then.
After some calling around I found Steve Van Natten who runs an excellent piano repair site. He also was willing to sell individual hammers (many places would only sell complete sets for much $$!).
I bought two new hammers (in case I buggered one), a new hammer butt, a
dozen hammer shanks, a full set of bridle straps, some brass tubes for repairing
hammer shanks, some rubber buttons, and two knobs for the cabinet. Grand
total was about $50 with shipping and it took about 3 days to arrive. I am
very pleased! ![]()
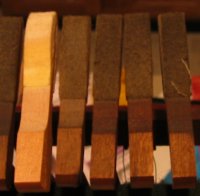
 While
waiting for the parts my kids and I cleaned all the keys. Since they
are ivory we used (obviously) toothpaste to clean them. The ebony was
caked with some ancient cleaning product that I was able to remove with mild
detergent and some effort. The fuzzy picture (sorry!) shows the before and
after on the keys. The other picture shows a mangled piano! The
finished keys are on the right (treble). The bass keys have not been done
yet. You can sure tell the difference! We also vacuumed about 100
years worth of dust bunnies out of the thing.
While
waiting for the parts my kids and I cleaned all the keys. Since they
are ivory we used (obviously) toothpaste to clean them. The ebony was
caked with some ancient cleaning product that I was able to remove with mild
detergent and some effort. The fuzzy picture (sorry!) shows the before and
after on the keys. The other picture shows a mangled piano! The
finished keys are on the right (treble). The bass keys have not been done
yet. You can sure tell the difference! We also vacuumed about 100
years worth of dust bunnies out of the thing.
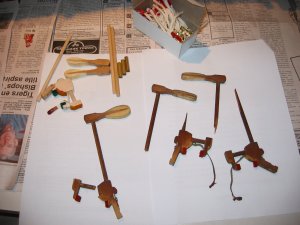 You can see in the picture
the broken parts as well as the replacements. Note that this is just
what was broken when I started. I found some other problems as I
continued!
You can see in the picture
the broken parts as well as the replacements. Note that this is just
what was broken when I started. I found some other problems as I
continued!
First I removed a good hammer to use as a model and cut a new shank to length. I then assembled the new hammer butt, hammer, and shank into a complete assembly.
Next came the old hammers with broken shanks. My first instinct was to remove the old shanks and replace them. Then I realized I could mix and match the parts to make full-length shanks then use the brass splice tubes to join them. After some careful measurements, cutting, and gluing I ended up with this:
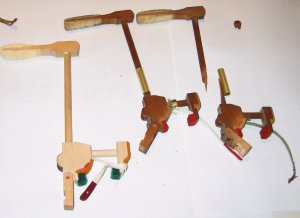 This
is right before I glued the last hammer. The new hammer assembly is on the
left, a spliced hammer is in the middle, and a ready-to-splice hammer is on the
right.
This
is right before I glued the last hammer. The new hammer assembly is on the
left, a spliced hammer is in the middle, and a ready-to-splice hammer is on the
right.
 Notice
the wooden flanges that the hammer assemblies pivot on. The picture at
left has a close-up. These became an ongoing problem. There is one
flange on the hammer butt and one on the "sticker" at the bottom of
the action. I found one broken one and broke two others while working on
the action. They all split at the pivot end across the pivot pin (sorry, I
did not get a picture). Rather than wait for parts I managed to glue and
clamp the old flanges. They seem OK. I hope they hold.
Notice
the wooden flanges that the hammer assemblies pivot on. The picture at
left has a close-up. These became an ongoing problem. There is one
flange on the hammer butt and one on the "sticker" at the bottom of
the action. I found one broken one and broke two others while working on
the action. They all split at the pivot end across the pivot pin (sorry, I
did not get a picture). Rather than wait for parts I managed to glue and
clamp the old flanges. They seem OK. I hope they hold.
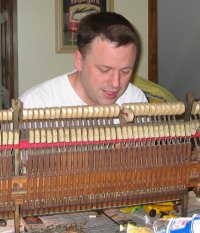 After
the gluing was finished I replaced the bridle straps. There is probably a
trick to this but I never found it. The best method I found was to use
medical forceps to grab the end of the strap and pull it through the hole in the
butt and snap the clip on. Here I am with dust in my hair and my
eyes crossed about halfway down.
After
the gluing was finished I replaced the bridle straps. There is probably a
trick to this but I never found it. The best method I found was to use
medical forceps to grab the end of the strap and pull it through the hole in the
butt and snap the clip on. Here I am with dust in my hair and my
eyes crossed about halfway down.
 Finally
I replaced the hammers I removed and surveyed my work. I made one major
error. I should not have glued the spliced hammer shanks until they were
in place. I ended up with two hammers a little cockeyed. Lucky for
me they are the upper two keys on the keyboard (who uses those anyway?!?).
They do not hit each other and they still hit the strings so I will just live
with it. At least the new hammer looks good.
Finally
I replaced the hammers I removed and surveyed my work. I made one major
error. I should not have glued the spliced hammer shanks until they were
in place. I ended up with two hammers a little cockeyed. Lucky for
me they are the upper two keys on the keyboard (who uses those anyway?!?).
They do not hit each other and they still hit the strings so I will just live
with it. At least the new hammer looks good.
Here is the complete action:
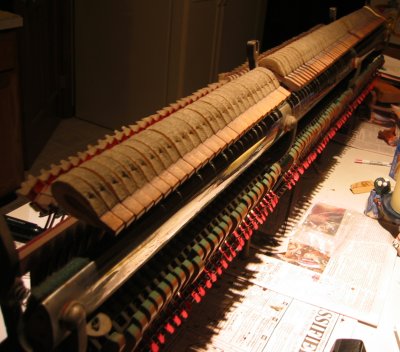
Not bad! Some of green backcheck blocks are out of line. I am not sure if that is a problem or not. It can be adjusted but I will leave that to a professional. Notice how nicely the chrome cleaned up.
The problem with pedal turned out to be the wooden blocks the pedals pivot in. Two of them split and the pedal was free to just flop around. As usual I started doing it the hard way (making new blocks) when I realized I could just flip the existing blocks over. I re-drilled the holes for the pedal pivots and put everything back together. Works great but I did not get a good picture.
My wife and I replaced the action in the piano and tested. It needs tuned in the worst way but everything works! I still need to replace the rubber bumpers on the cabinet and put the cabinet back together. I will probably get it tuned first so I can have a professional check out my work.